The Battle of Sole Bay 7 June 1672 Tuesday, Dec 6 2011 

Sea motive

Sea motive

The Battle of Sole Bay 1672 was the first major naval engagement in the 3rd Anglo Dutch War & Franco Dutch war, between the Kingdoms of France and England against the Republic of the Seven United Provinces.

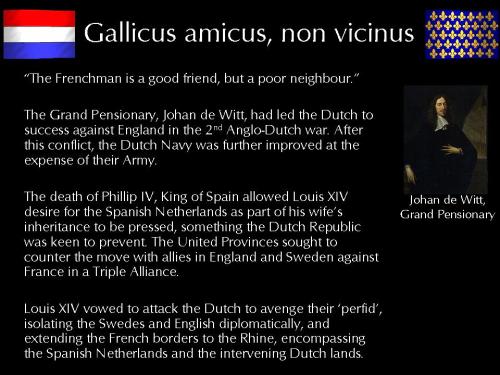
Louis XIV needed to isolate potential allies of the United Provinces, and find a cause for the war he planned.

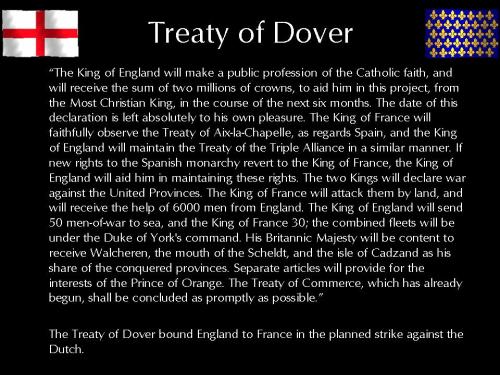
The treaty of Dover, signed between Charles II and Louis XIV in 1670, was kept secret from all but a few of Charles II advisors.

The fifth clause of the treaty stated that England and France agreed to wage war jointly with all their forces by land and sea, in order to humble the pride of the States General and ‘reduce the power of a nation which even has the insolence to aim now at setting itself up as sovereign arbiter and judge of all other potentates’.

Johan de Witt, the Grand Pensionary, and the Dutch seemed unaware at the forces being directed against them.

Charles II sent a vessel, the Merlin, with Lady Crow, the wife of the Ambassador in Amsterdam as passenger, with Captain Crow as commander under orders to meet a Dutch fleet and gain a salute from them, if necessary by firing upon them. This calculated act failed to garner either a salute from the Dutch, or a returning salvo, so on return to England, Captain Crow was sent to the Tower of London for his troubles.

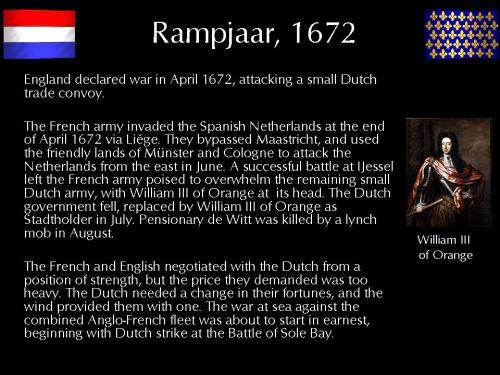
Sir George Downing was sent to Amsterdam to engineer a quarrel; ‘Our business is to break with them and yet to lay the breache at their door.’ In the event this too failed, and Sir George Downing was also sent to the Tower of London. Eventually, simple military expedients were made, and the English attacked a Dutch trade fleet in the English channel to small effect. The declaration of war between Engalnd and the United Provinces followed shortly thereafter. France soon declared war, with Louis XIV citing many of the same causes as the English; insults to himself and a desire to reduce the Netherlands to compliance to his will.

The Rampjaar (disaster year) for the United Provinces began with the French invasion by two main armies, led by Maréchals Turenne and Condé, with a combined army of 150,000. Towns and fortresses fell before the French advance, and the situation for the Dutch was very grave.

A change in the winds provided the Dutch with the opportunity to change their fortunes at sea. A strike by the Dutch fleet against the recently combined Anglo-French fleet would put pressure on their enemies.

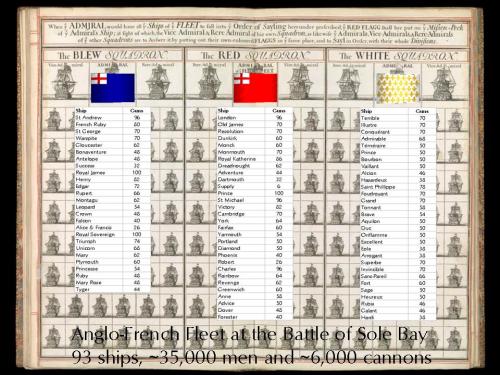
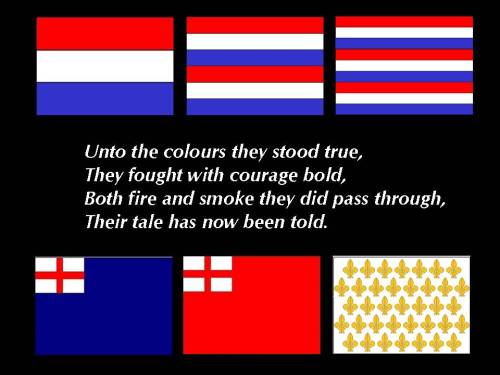
Typically for the age of sail, the English and French organised their ships into three divisions. The van (blue squadron), the centre (red squadron) and the rear (white squadron).

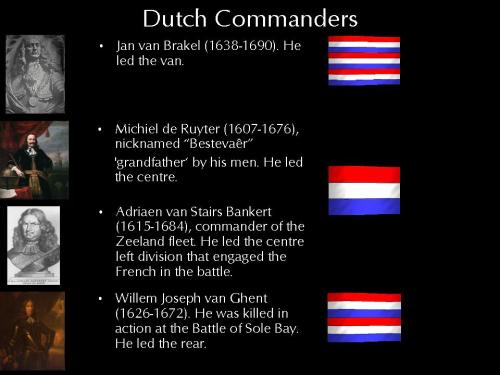
The Dutch assigned their squadrons by admiralties, each province raising their own fleet. They were denoted by the  Prinsenvlag, or the double or triple Prinsenvlag.

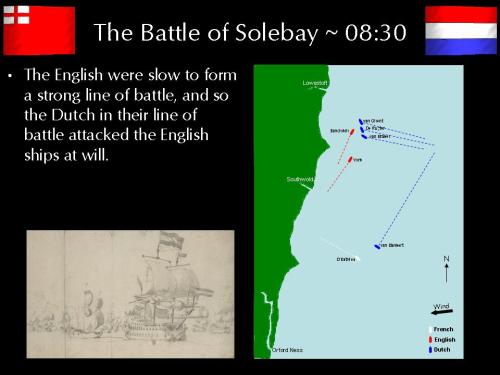
The Dutch fleet crossed the North sea undetected, until finally being picked up close to the Suffolk coast by a French frigate on picket duty. This promptly returned to the English coast to raise the alert. Only a few hours remained before the Dutch would attack, and the English and French fleets were still at anchor, with many men ashore.

Either by design or in the confusion, the English and French fleets split into two; the English squadrons headed North and the French squadron headed South. This tactical mistake allowed the Dutch to send one division under van Bankert to engage with the French, with the remainder of the Dutch fleet under De Ruyter to engage with the English, initially at an advantage in ships of 3:2.

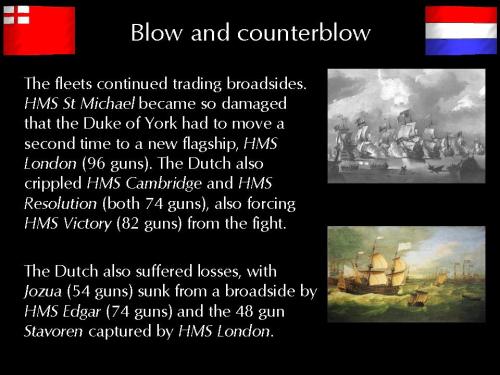
De Ruyter singled out the English Flagships, identified by their extra large pennants, and attacked these causing terrible damage to ships and men.

Under fire on board HMS Royal Prince, the Duke of York came in for fulsome praise from Captain John Narbrough.

‘His Royal Highness went fore and aft in the ship and cheered up the men to fight which did encourage them very much. The Duke thought himself never near enough to the enemy, for he was ever calling to the quarter-master which cunded the ship to luff her nearer… Presently when Sir John Cox was slain, I commanded as captain, observing his Royal Highness’s commands in working the ship, striving to get the wind of the enemy. I do absolutely believe no prince upon the whole earth can compare with his Royal Highness in gallant resolution in fighting his enemy, and with so great a conduct and knowledge in navigation as never any general  understood before him. He is better acquainted in these seas than many masters which are now in his fleet; he is a general, soldier, pilot, master, seaman; to say all, he is everything that man can be, and most pleasant when the great shot are thundering about his ears.’ 

On board HMS Royal Prince, ensign John Churchill survived the battle, later to serve in the English army in the war at the Battle of Enzheim. The Duke of York was forced to abandon his flagship in favour of HMS Michael.

The same tactic was applied to the flagship of the English blue squadron, HMS Royal James, under the command of the Earl of Sandwich.

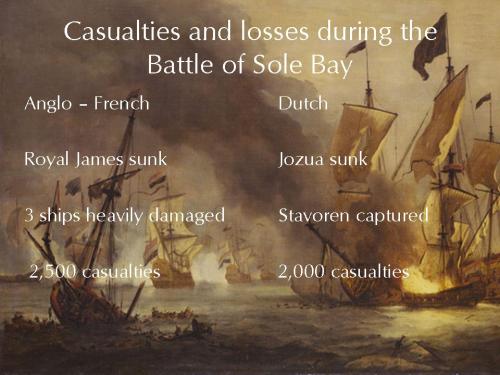
HMS Royal James succumbed to fireship attack by the Dutch and she burnt, with the loss of the Earl of Sandwich and most of his crew.

The battle continued most of the day, with fierce exchanges between all squadrons.

With the Dutch fleets recombined, and the wind beginning to turn against them, the Dutch fleet headed for home. The Anglo-French fleet did not pursue. The battle belonged to the Dutch.

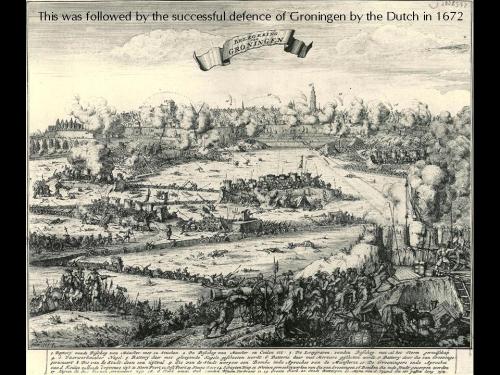
Shortly after their fleet returned to the Netherlands, the Dutch opened the sluices at Muiden, flooding the waterline (Hollandsche Waterlinie). This stalled the French advance for 1672.

The Dutch had survived their Annus Horribilis. The war expanded with the Elector of Brandenburg, followed shortly by the Austrians under Emperor Leopold I and the Spanish joining the fray on the Dutch side, and Sweden joining on the French side. England sued for peace after the Dutch victory at the Battle of Texel, 1674.

William III of Orange and the Dutch were to remain at the centre of resistance to French expansion, and played major roles in the League of Augsburg and the Nine Years war, followed by the war of the Spanish Succession.

The battle of Sole Bay was celebrated in the

by the following English paean, printed in 1818.

A MERRY SONG ON THE Duke’s late glorious success over the Dutch
Tune Suffolk Stiles

ONE day as I was sitting still,
Upon the side of Dunwich hill,
And looking on the ocean,
By chance I saw De Ruyter’s fleet
With Royal James’s squadron meet,
In sooth it was a noble treat
To see that brave commotion.

I cannot stay to name the names
Of all the ships that fought with James,
Their number or their tonnage,
But this I say the noble host
Right gallantly did take its post
And cover’d all the hollow coast
From Walderswyck to Dunwich.

The French who should have join’d the Duke,
Full far astern did lag and look
Although their hulls were lighter,
But nobly faced the Duke of York,
Tho’ some may wink, and some may talk,
Right stoutly did his vessel stalk
To buffet with De Ruyter.

Well might you hear their guns, I guess,
From Sizewell-gap to Easton Ness,
The show was rare and sightly:
They batter’d without let or stay
Until the evening of that day
‘T’was then the Dutchmen ran away,
The Duke had beat them tightly.

Of all the battles gain’d at sea
This was the rarest victory
Since Philip’s grand Armado.
I will not name the rebel Blake,
He fought for horson Cromwell’s sake,
And yet was forced three days to take
To quell the Dutch bravado.

So now we’ve seen them take to flight,
This way, and that, where e’er they might
To windward or to leeward;
Here’s to King Charles, and here’s to James,
And here’s to all the captains names,
And here’s to all the Suffolk dames,
And here the House of Stuart.

References

The slides are available as a powerpoint slide pack.

Battle of Solebay 1672

The Battle of Sole Bay 7 June 1672 Redux Tuesday, Dec 6 2011 

Sea motive

Sea motive


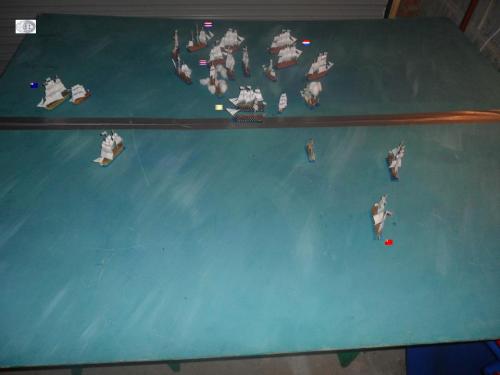
This reenactment of the main fleet action during the Battle of Solebay scales the number of ships used down by a factor about of 3-4, so there are 12 Dutch Ships of the Line versus 10 ships for the Anglo-French fleet (6 English and 4 French) respectively. In addition, each side has six fireships to match the large numbers employed by each side  in the real battle.

The  Solebay ship damage sheets and the ship names are found in the link. The rules for the battle can be found here.

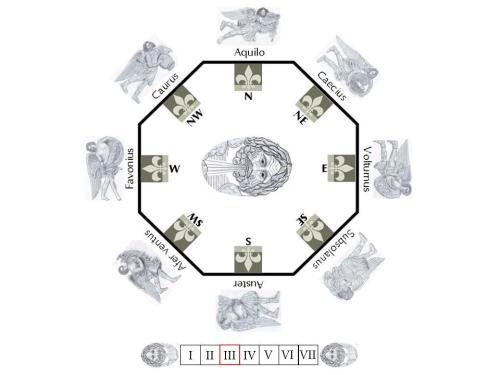
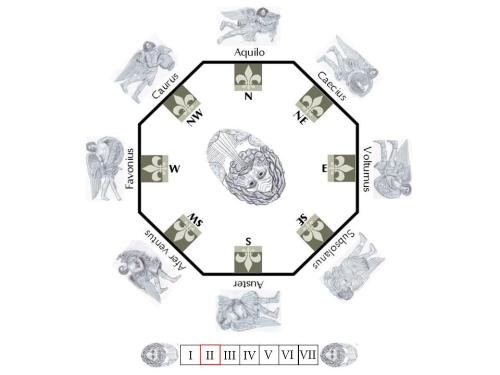
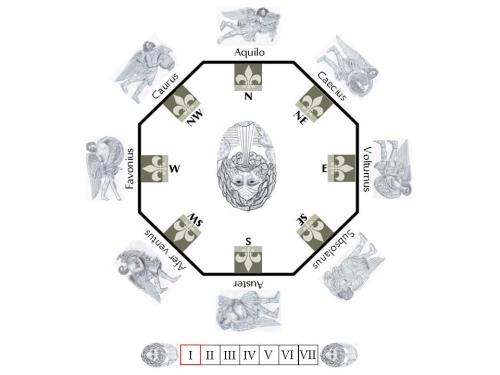
One difference to the real battle is to allow the winds (represented by the gods of the winds, the Venti) to change according to a dice roll at the end of each move. If the score is 1, the wind changes 1 point anticlockwise, 2-5 gives no change to the direction, and if a 6 is thrown, the wind changes 1 point clockwise. Likewise the strength of the wind may change, with a die roll of 1 decreasing it by one unit, 2-5 gives no change, and 6 increases it by one unit. Thus the capriciousness of the Venti can decide the fleet action on the day as the winds work in favour of one or other fleet, due to their possession of the weather gauge and the relative ease of movement given by the points of sail in the rules.

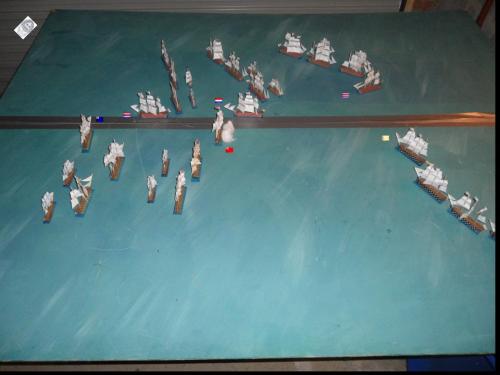
The fleets assume the positions used on the day, approximately those before the battle began at 08:30. The French ships form line ahead, and sail north to south. The English are struggling to form line ahead sailing south to north. Meanwhile, the Dutch sail with the easterly winds behind them, heading initially for the Anglo-French fleet.

The initial weather conditions match those at the start of the battle and are given by the Venti

Move 1

Volturnus blows with moderate strength from the east, propelling the Dutch fleet towards their Anglo-French adversaries, struggling to form a coherent line of battle. The English are sailing northwards, the French to the south.

Admiral De Ruyter, leading the prinsenvlag division signals to van Banckert, leading the triple prinsenvlag division to engage the French and their white flags. He will lead the other two divisions onto the English.

The Duke of York, leading the red division looks on aghast at his French allies, led by D’Estrées as they sail away from him.

Move 2

The wind and the fleets continue as before, with more of the Dutch coming over the horizon.

Move 3

At last the English begin to turn towards the enemy, with HMS St Andrew of the Blue squadron and HMS London of the Red squadron steering as close to the wind as they dare. van Banckert, turns his squadron led by Westfriesland of the triple prinsenvlag division towards the French.

Move 4

HMS St Andrew of the Blue squadron heads south east, close hauled, beating towards the Dutch. Even the White squadron l’Terrible has begun the same process, but heading on a north easterly course. The Dutch sail onwards, Westfriesland of the triple prinsenvlag squadron pulling away from the Dolphijn, leading the single prinsenvlag squadron.

Move 5

Volturnus continues to blow with moderate strength from the east, forcing the English and French squadrons to beat towards the Dutch bearing down on them. The Maagd van Dordrecht, leading the double prinsenvlag squadron separates from the Dolphijn. Will they manage to cross the T of the Anglo-French fleet? Only time and the next few manoeuvres will tell.

Move 6

The fleets are closing together fast, with the Dutch fan tailing out to intercept the English. The White squadron, lead by l’Terrible tacks to head on a south easterly course.

Move 7

Volturnus tires and passes the burden of the breeze to the south easterly zephyr, Subsolanus, who continues at reduced strength. The change in direction causes l’Terrible to immediately change tack and head north. The English blue and red squadrons head east. The Dutch continue to fan out in line astern, prior to the engagement.

Move 8

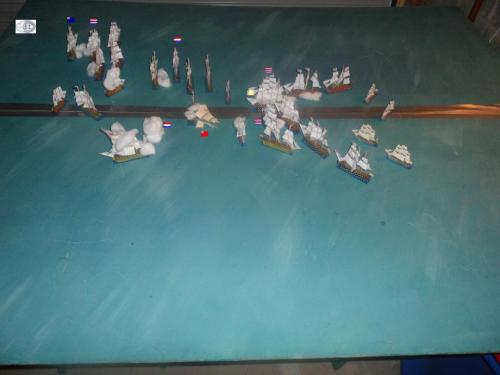
The first broadside comes from HMS Dreadnought, but it fails to make a mark on the leading Dutch ship, Dolphijn. The Dutch squadrons are trying to ‘ cross the T ‘ of the English.

Damage points:- Dutch = 0,  Anglo-French = 0

Move 9

Subsolanus, the zephyr of the south easterly breeze continues at a reduced strength. The paths of the first ships cross, leading to an exchange of fire between the Dolphijn and HMS Dreadnought. The honours favour the English. Both the English (HMS Dartmouth) and the Dutch (Gorinchem) light a fire ship apiece, sending them forwards in the expectation of disrupting the opposite fleet, and the hope of hitting a target. The crew of these ships row away steadfastly, seeking rescue from a friendly ship before the chaos ensues.

Damage points:- Dutch = 3,  Anglo-French = 2

Move 10

The English blue squadron gets to  ‘ cross the T ‘ of the Dutch double Prinsenvlag squadron and HMS St Andrew gives Maagd van Dordrecht a broadside.  HMS Dartmouth, the fire ship, causes anxiety to the rest of the ships in this Dutch squadron as the burning hulk bears down on them. The Dutch fire ship, Gorinchem, causes the English red squadron to take sail in, allowing the fire ship to pass. HMS Dreadnought receives more damage.

The French squadron steers north-east towards the melee, but they are still some distance away.

Damage points:- Dutch = 4,  Anglo-French = 5

Move 11

Auster, the zephyr of the south wind takes over the burden of the wind. The battle between the English Blue squadron and the Dutch double  Prinsenvlag squadron now breaks down into a series of ship duels, with HMS Royal James particularly suffering. In retaliation, the English set alight HMS Success and she begins drifting towards the Dutch. Likewise, the English Red squadron and the Dutch  Prinsenvlag squadron also breaks down into ship to ship duels.  The first two fire ships coast gently on their way, missing their targets, but causing ships to swerve. The French white squadron is close to engaging with the Dutch triple Prinsenvlag squadron.

Damage points:- Dutch = 7,  Anglo-French = 9

Move 12

Auster continues to blow down on the chaos below. Maagd van Dordrecht receives another broadside and her fore and main masts are brought down. HMS Robert is put on fire, as she rams into the stricken ship and sets her alight. The frantic Dutch crew try to halt the flames, but in vain. But all does not go the English way, as HMS Dreadnought’s rigging is also brought down.

Damage points:- Dutch = 12,  Anglo-French = 11

Move 13

Subsolanus, the zephyr of the south easterly breeze regains strength and blows. The crew of the Maagd van Dordrecht  fail to put out the fire and it grows. The ship will surely explode soon, and some of the crew jump over the side, to take their chance with the sea.

The crew of the Vrede set her on fire and she coasts into the side of HMS Prince from the Red squadron. The Dutch crew watch with grim satisfaction as the fire catches. Their work done, they row towards a friendly Dutch ship.

In the chaos of HMS Dreadnought’s rigging, a fire breaks out in the fallen sails, and another ship begins the fight for survival.

The English Blue squadron and the Dutch double Prinsenvlag squadron steer away from the fires, with the leading ships trading ineffectual broadsides as they go.

L’Terrible and the Westfriesland begin trading broadsides.

Damage points:- Dutch = 13,  Anglo-French = 17

Move 14

Once again, Auster, the zephyr of the south wind takes over the burden of the wind, but does so with the lightest of breezes.

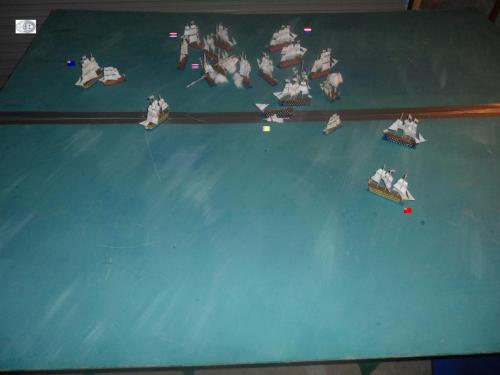
The Maagd van Dordrecht explodes, showering burning wood, metal and alas the crew across the sea.  HMS Prince, already struggling from the fire ship conflagration is caught in the demise of the Dordrecht, as two fierce fires burn. The crew, seeing the fate of the Dutch vessel, abandon ship.   HMS Dreadnought’s rigging continues to burn, and her crew also looks nervously on at the fate of the Dordrecht.

The Dutch single and double  Prinsenvlag squadrons sail to the east, with the die Zeven Provinciem  taking the worst of the damage.

The Westfriesland of the triple  Prinsenvlag squadron has no choice but to sail south west, and she suffers a pummeling from L’Terrible and le Sainte Phillipe, and HMS London. The rest of the Dutch triple  Prinsenvlag squadron, led by Pacificatie intercept the French White squadron.

Damage points:- Dutch = 24,  Anglo-French = 19

Move 15

Auster continues to blow with the lightest of breezes.

HMS Dreadnought succumbs to the fire and explodes, showing burning fragments across the sea. Far off to shore, the people of Suffolk hear the explosion, but cannot see who has fallen.

The Westfriesland continues its south westerly course, being boxed in by the English and French ships tormenting her.  L’Terrible, le Sainte Phillipe and L’ Superbe all fire into the Dutch ship, who returns fire as best she can. At the intersection of the Dutch and French squadrons, L’ Terrible and Pacificatie trade blows. Elsewhere, the English and Dutch squadrons sailing eastwards also continue to exchange broadsides, causing little damage.

Damage points:- Dutch = 29,  Anglo-French = 31

Move 16

HMS Prince explodes and sinks, another English ship lost today. The echo of the moment reaches the shores of Suffolk minutes many seconds later.

The Westfriesland is now a wreck; fore, main and mizzen masts have fallen and two fires have broken out. But all does not go the French way, as  L’ Terrible loses her fore and main mast.

The Dutch single and double Prinsenvlag squadrons sail to the south east, with the English blue squadron breaking off the chase.

Damage points:- Dutch = 35,  Anglo-French = 46

Move 17

Auster, the zephyr of the south wind continues with the lightest of breezes.

L’ Superb suffers at the hand of the Dutch, but the Allies inflict no damage in return.

Damage points:- Dutch = 35,  Anglo-French = 48

Move 18

The Dutch Single and Double Prinsenvlag squadrons sail to the south east, leaving the fight to their Triple Prinsenvlag squadron. The French continue to fire back.

Damage points:- Dutch = 35,  Anglo-French = 48

Move 19

What remains of the Westfriesland explodes and sinks. L’ Terrible loses her mizzen mast and now drifts helplessly, prey for Dutch fire ships.

Damage points:- Dutch = 37,  Anglo-French = 52

Move 20

HMS Royal James of the blue squadron pursues the Dutch Single and Double Prinsenvlag squadrons.  She remains in danger of being surrounded if the Dutch turn around.

Damage points:- Dutch = 38,  Anglo-French = 53

Move 21

The Dutch Single and Double Prinsenvlag squadrons turn to the south west, and consequently HMS Royal Prince suffers at the hand of the Dutch. She loses her mizzen mast, which will slow her down.

Damage points:- Dutch = 38,  Anglo-French = 54

Move 22

L’ Superb explodes and sinks. The remaining Allied ships know the battle is lost and begin to turn towards the east to sail home.

Damage points:- Dutch = 40,  Anglo-French = 65

Move 23

Only HMS Royal Prince continues the duel with the Dutch, inflicting damage on the Wapen van Enkhuizen.

Damage points:- Dutch = 41,  Anglo-French = 65

Move 24

HMS Royal Prince continues the duel with the Wapen van Enkhuizen, but neither ship does any damage.

Damage points:- Dutch = 41,  Anglo-French = 65

Move 25

The fleets have now disengaged and begin to sail towards their homes.

Damage points:- Dutch = 41,  Anglo-French = 65

Move 26

Auster, the zephyr of the south wind continues with the lightest of breezes, as he watches the ships sail for home.

The Dutch have a long journey and a hero’s welcome for their famous victory to look forward to.

The English and French ships have but a short time to reach shore and tell their tales of woe at the hands of their enemy.

Damage points:- Dutch = 41,  Anglo-French = 65

The entire battle sequence is available as an animated gif, best viewed in Windows picture viewer.

The Admirals fighting this battle were

Admiral Michiel de Ruyter

James, Duke of York, Lord High Admiral.